First and most important, always, always, always use good quality ribbon and tee shirts. I buy my ribbon from the Ribbon Retreat. They have top quality ribbon, a great selection and reasonable prices. Good tee shirts are available from Old Navy, Carters or any brand name store. .
Next, cut the ribbon a little longer than is needed for your embellishment. I will be adding this nautical ribbon across the front of the tee so I lay the ribbon on the shirt and cut it a bit longer than needed, this allows for the stretch of the tee shirt.
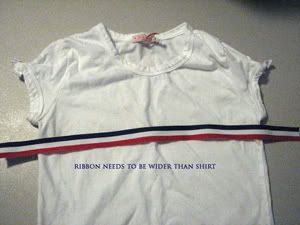
My ribbon is going across the chest and will run from under one arm to under the other arm, so I am going to rip out the side seam, on both sides, below the sleeve for a few inches, just enough for the ribbon to slip into. Doing this will give a very smooth side seam and the ribbon will lie securely.

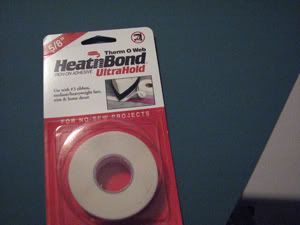
The next step is to fuse the ribbon to the shirt. I use 5/8" HeatnBond. This is an iron on adhesive that will fuse the ribbon to the shirt.
Preheat a dry iron to the silk setting. Cut a piece of HeatnBond the length of the ribbon. Place the HeatnBond in the center, on the wrong side of the ribbon-paper side up.

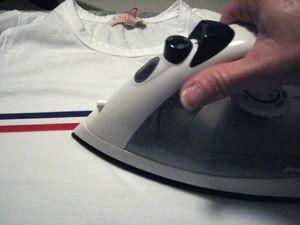
Place hot iron on the paper side for 2 seconds and repeat for the entire length of the ribbon. You have now turned your ribbon into an iron-on applique.
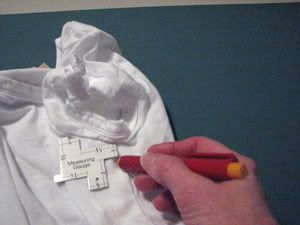
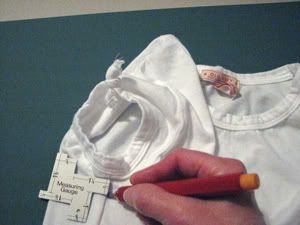
Now we are going to apply the ribbon to the tee shirt. You want to make sure it goes on straight so-turn the shirt right side out and measure down from the under arm-sleeve seam 1/2" on both sides and put a tiny mark.
Lay the shirt, right side up, on the ironing board and smooth it out. Peel the paper backing off of the HeatnBond and lay your ribbon wrong side down on the shirt-lining it up with the 2 marks you made. Press in place for about 8-10 seconds.

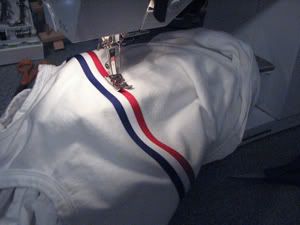
You are now ready to stitch the ribbon in place. You can use matching or contrasting thread to do this and you can use a zig zag stitch, a decorative stitch or a straight stitch. My ribbon has straight lines so I am going to use a straight stitch for a more classic look. Stitch along both long edges of the ribbon.
Your ribbon is now secure and you can stitch the side seams back together. If you have a serger, just serge off the excess ribbon, otherwise cut it off and finish the side seam with a zigzag stitch so no raw edges are showing. I always stitch first and finish off with the serger.
You can add multiple layers of coordinating ribbon by just repeating the above instructions. Your shirt will come out better if you lay the ribbons right next to each other, so no tee shirt can be seen between them, before fusing and sewing.
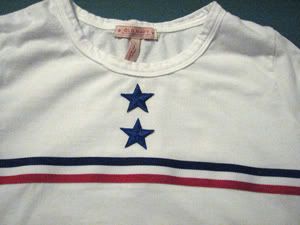
My shirt is ready for the rest of the embellishments. Maybe some stars, some fancy buttons or a bow.

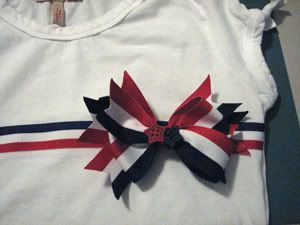
This customer wants the bow. If you decide to add a bow to your shirt it is a good idea to pin the bow to the shirt and not sew it. This makes laundering a lot easier as the bows really get messed up in the wash.
This is a great way to dress up plain tee shirts and to turn them into something every little or big princess will love!
No comments:
Post a Comment